How to Prep & Cook your Catch: Blackfin Tuna Tataki
Eugene L. 06.24.22

During my annual red snapper trip with Captain Josh of Heritage Excursions this year, we had an incredible day. While we always make sure to go during red snapper season, red Snappers play second fiddle to many of the other fish we catch out there. Usually, with first-place going to the grouper we catch along with the red snapper. While we caught a five-man limit of groupers, we caught some fantastic extras this year.
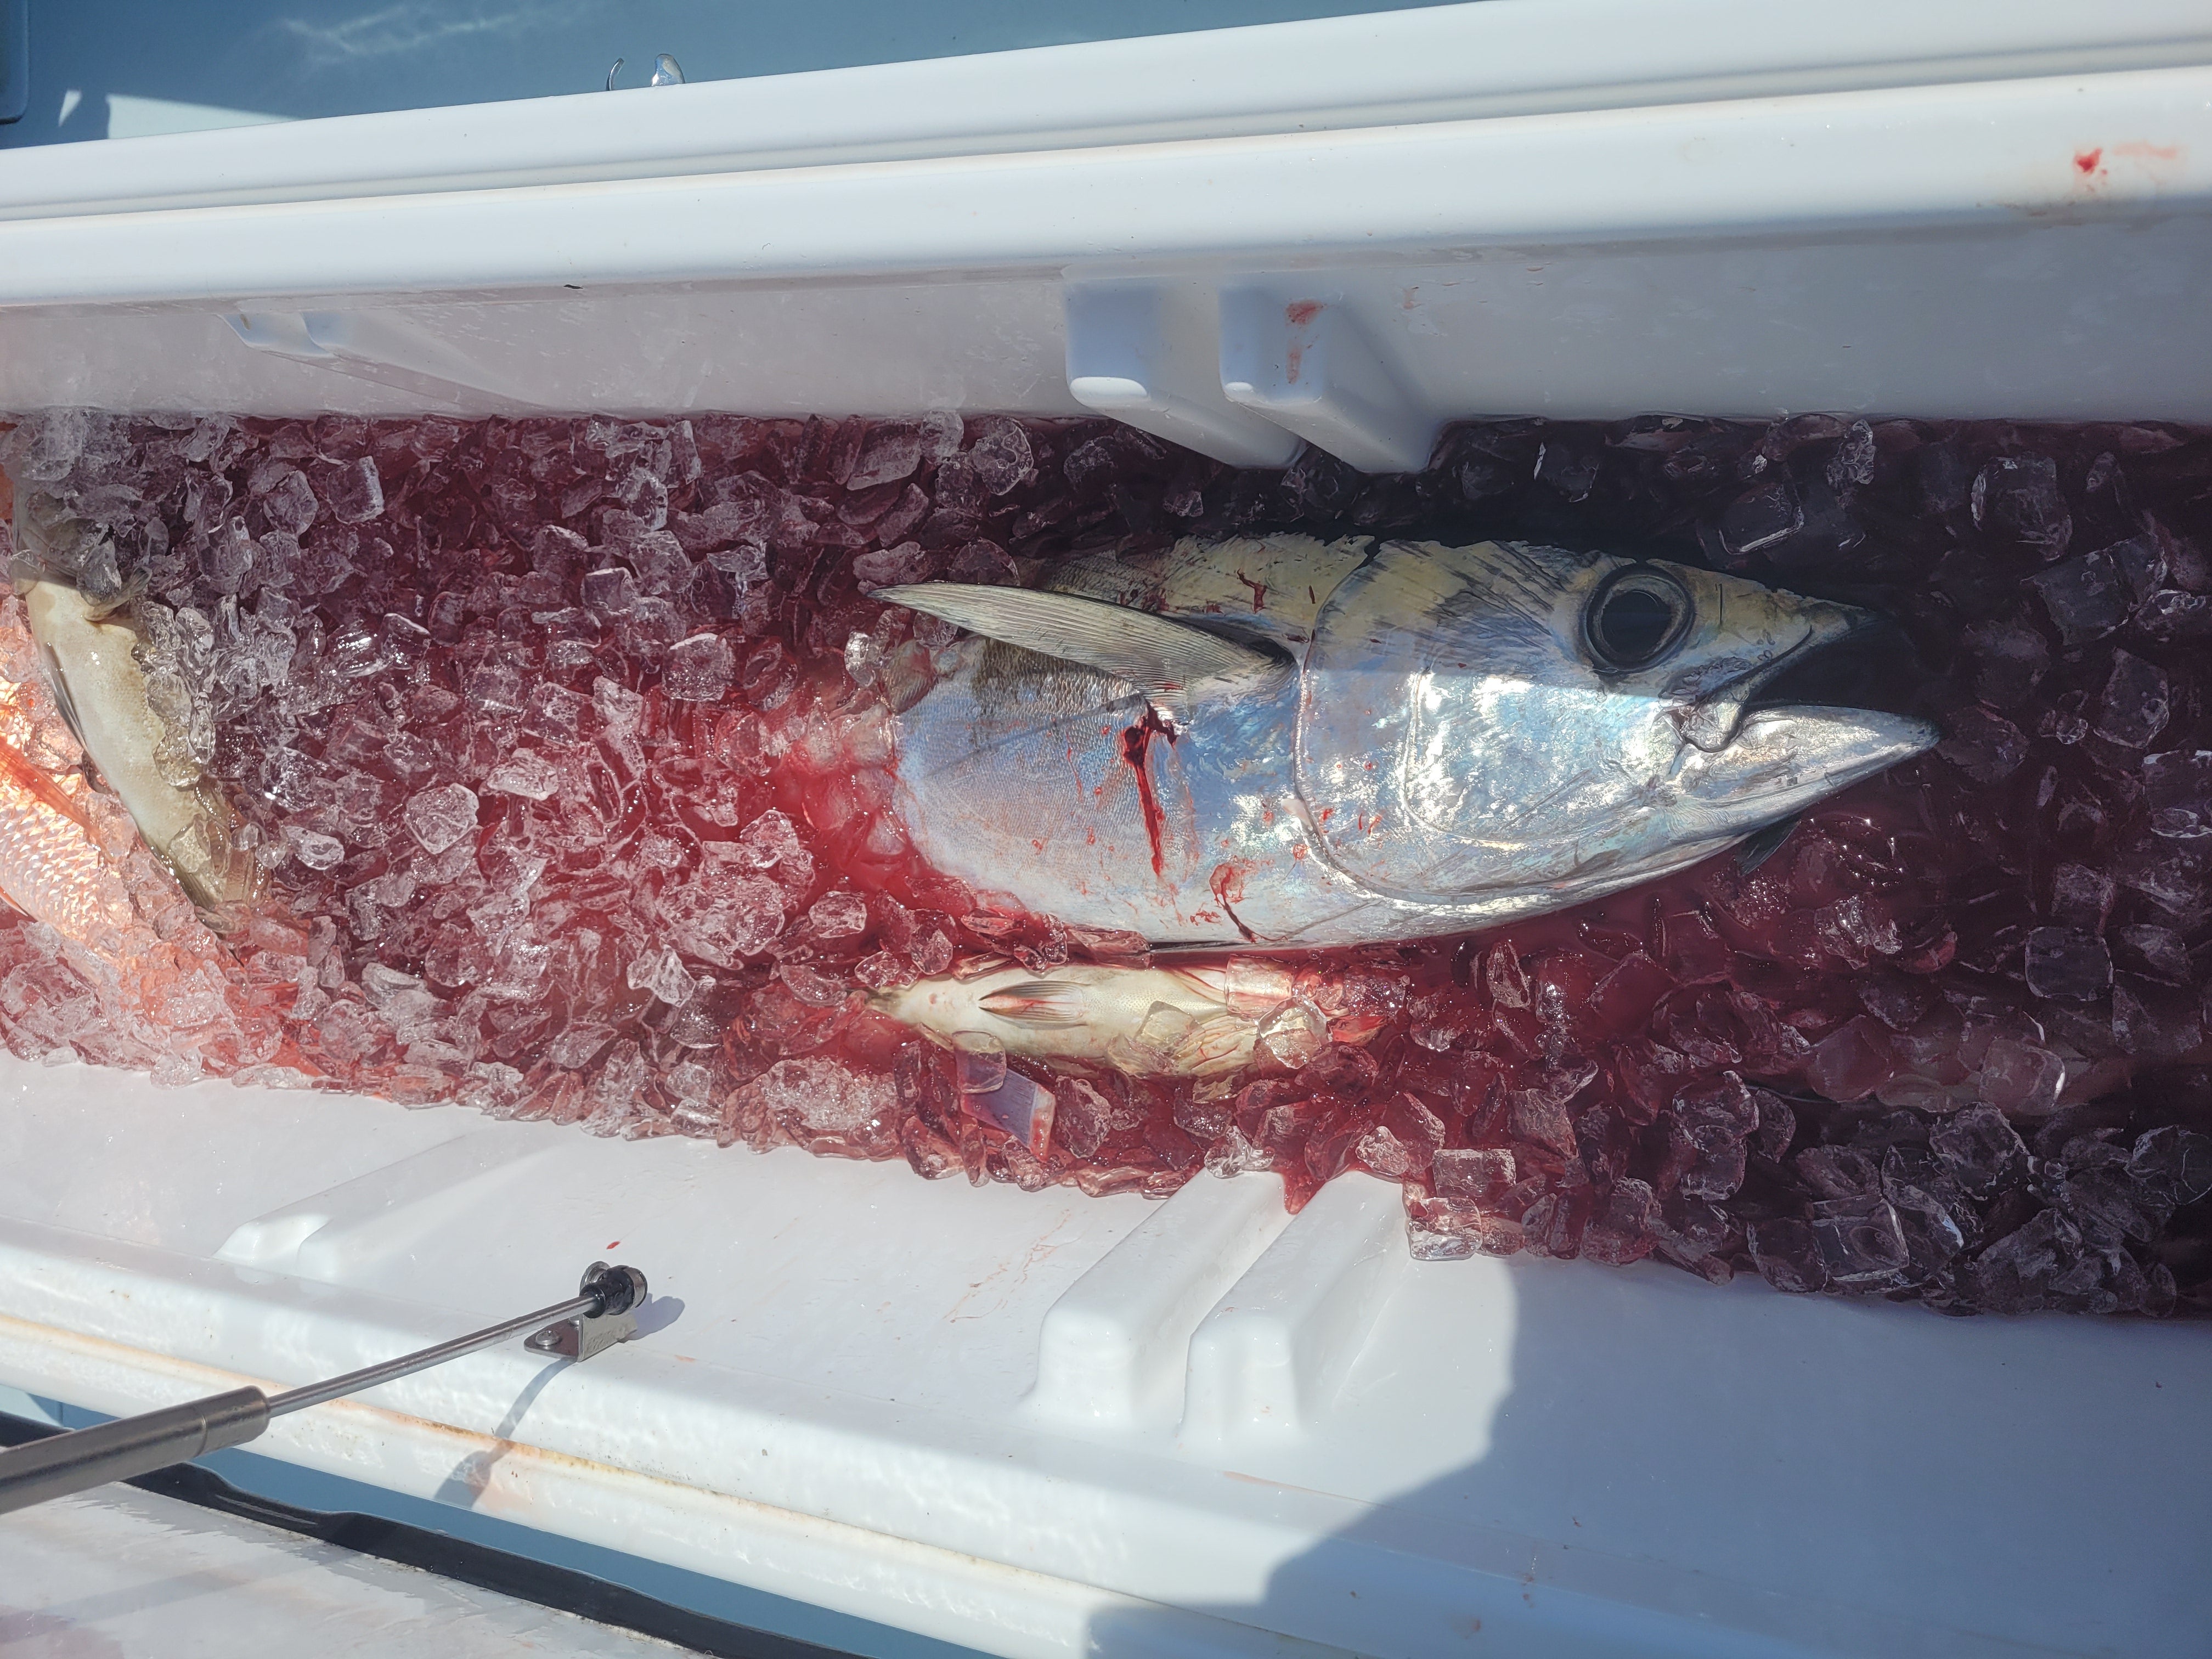
A couple of them were two big Blackfin Tuna caught on the bottom while chasing after snappers and groupers. They had either swam by and eaten the live cigar minnows while we were dropping the bait or reeling it up to check on it. Either way, they put up a hell of a fight and had everyone on board ecstatic. As far as bycatch goes only thing better would have been a wahoo or another cobia.
For eating any sort of tuna the prep has to start as soon as you get them on the boat. You have to try and get them bled out and dispatched as quickly as possible. I recommend cutting their gills, cutting them under the pec fins, and brain spiking them if possible. This will keep them in the best condition possible for eating. If you don’t you’ll end up with excess blood in the meat and bad texture due to lactic acid build-up from struggling.
Either back on shore or while, offshore it is also a good idea to gut them. You can cut around their vent to disconnect the GI tract. Then working from the gill plate use a knife to carefully disconnect the gills and throat from the fish. You can then pull all the guts out and then clean it out. This method is better for larger fish but can be done on blackfin tuna as well.
For breaking down blackfin tuna it is very easy, you want to remove the head first. Take your knife and work it from at an angle along the body up from the pelvic fins to the pectoral fins and along the back of the head. Once that’s cut along both sides you can break the head back and pop the head off all the way. Now you just fillet the blackfin tuna like any other fish, follow the bones until you reach the backbone. Once there, there is a line of pin bones that run the whole length of the fish. Just cut through them for now and they will be removed later.

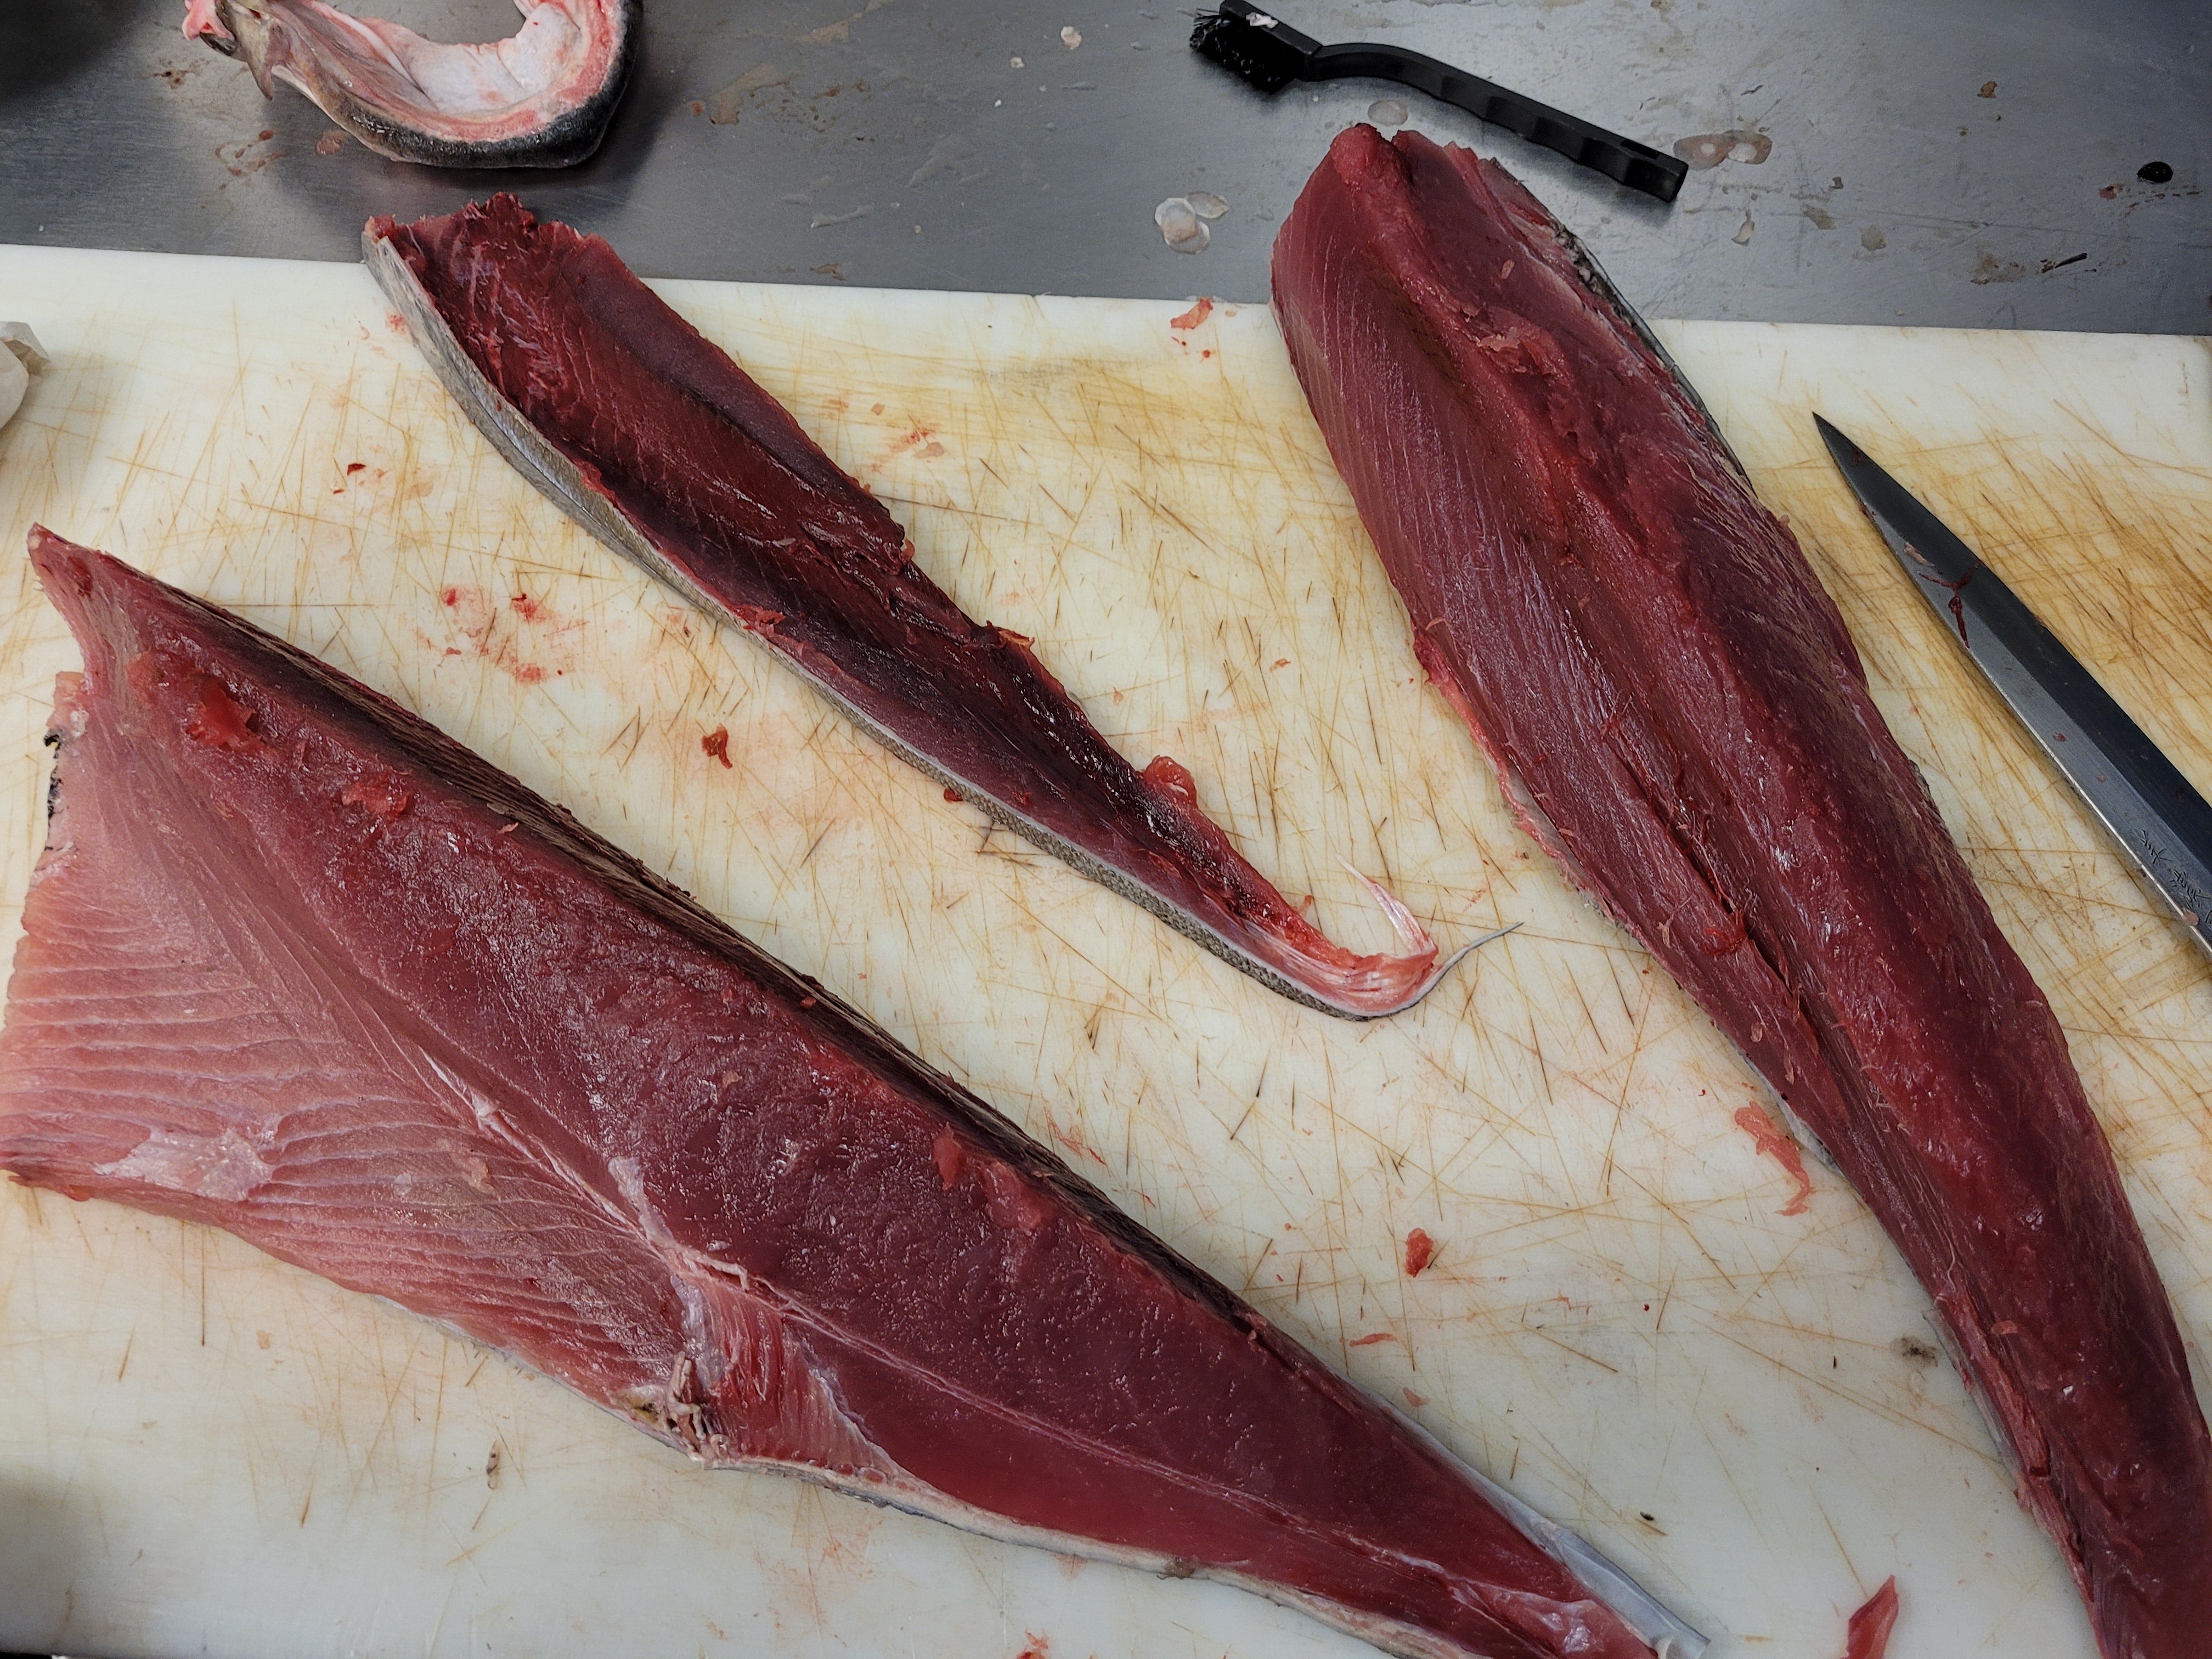
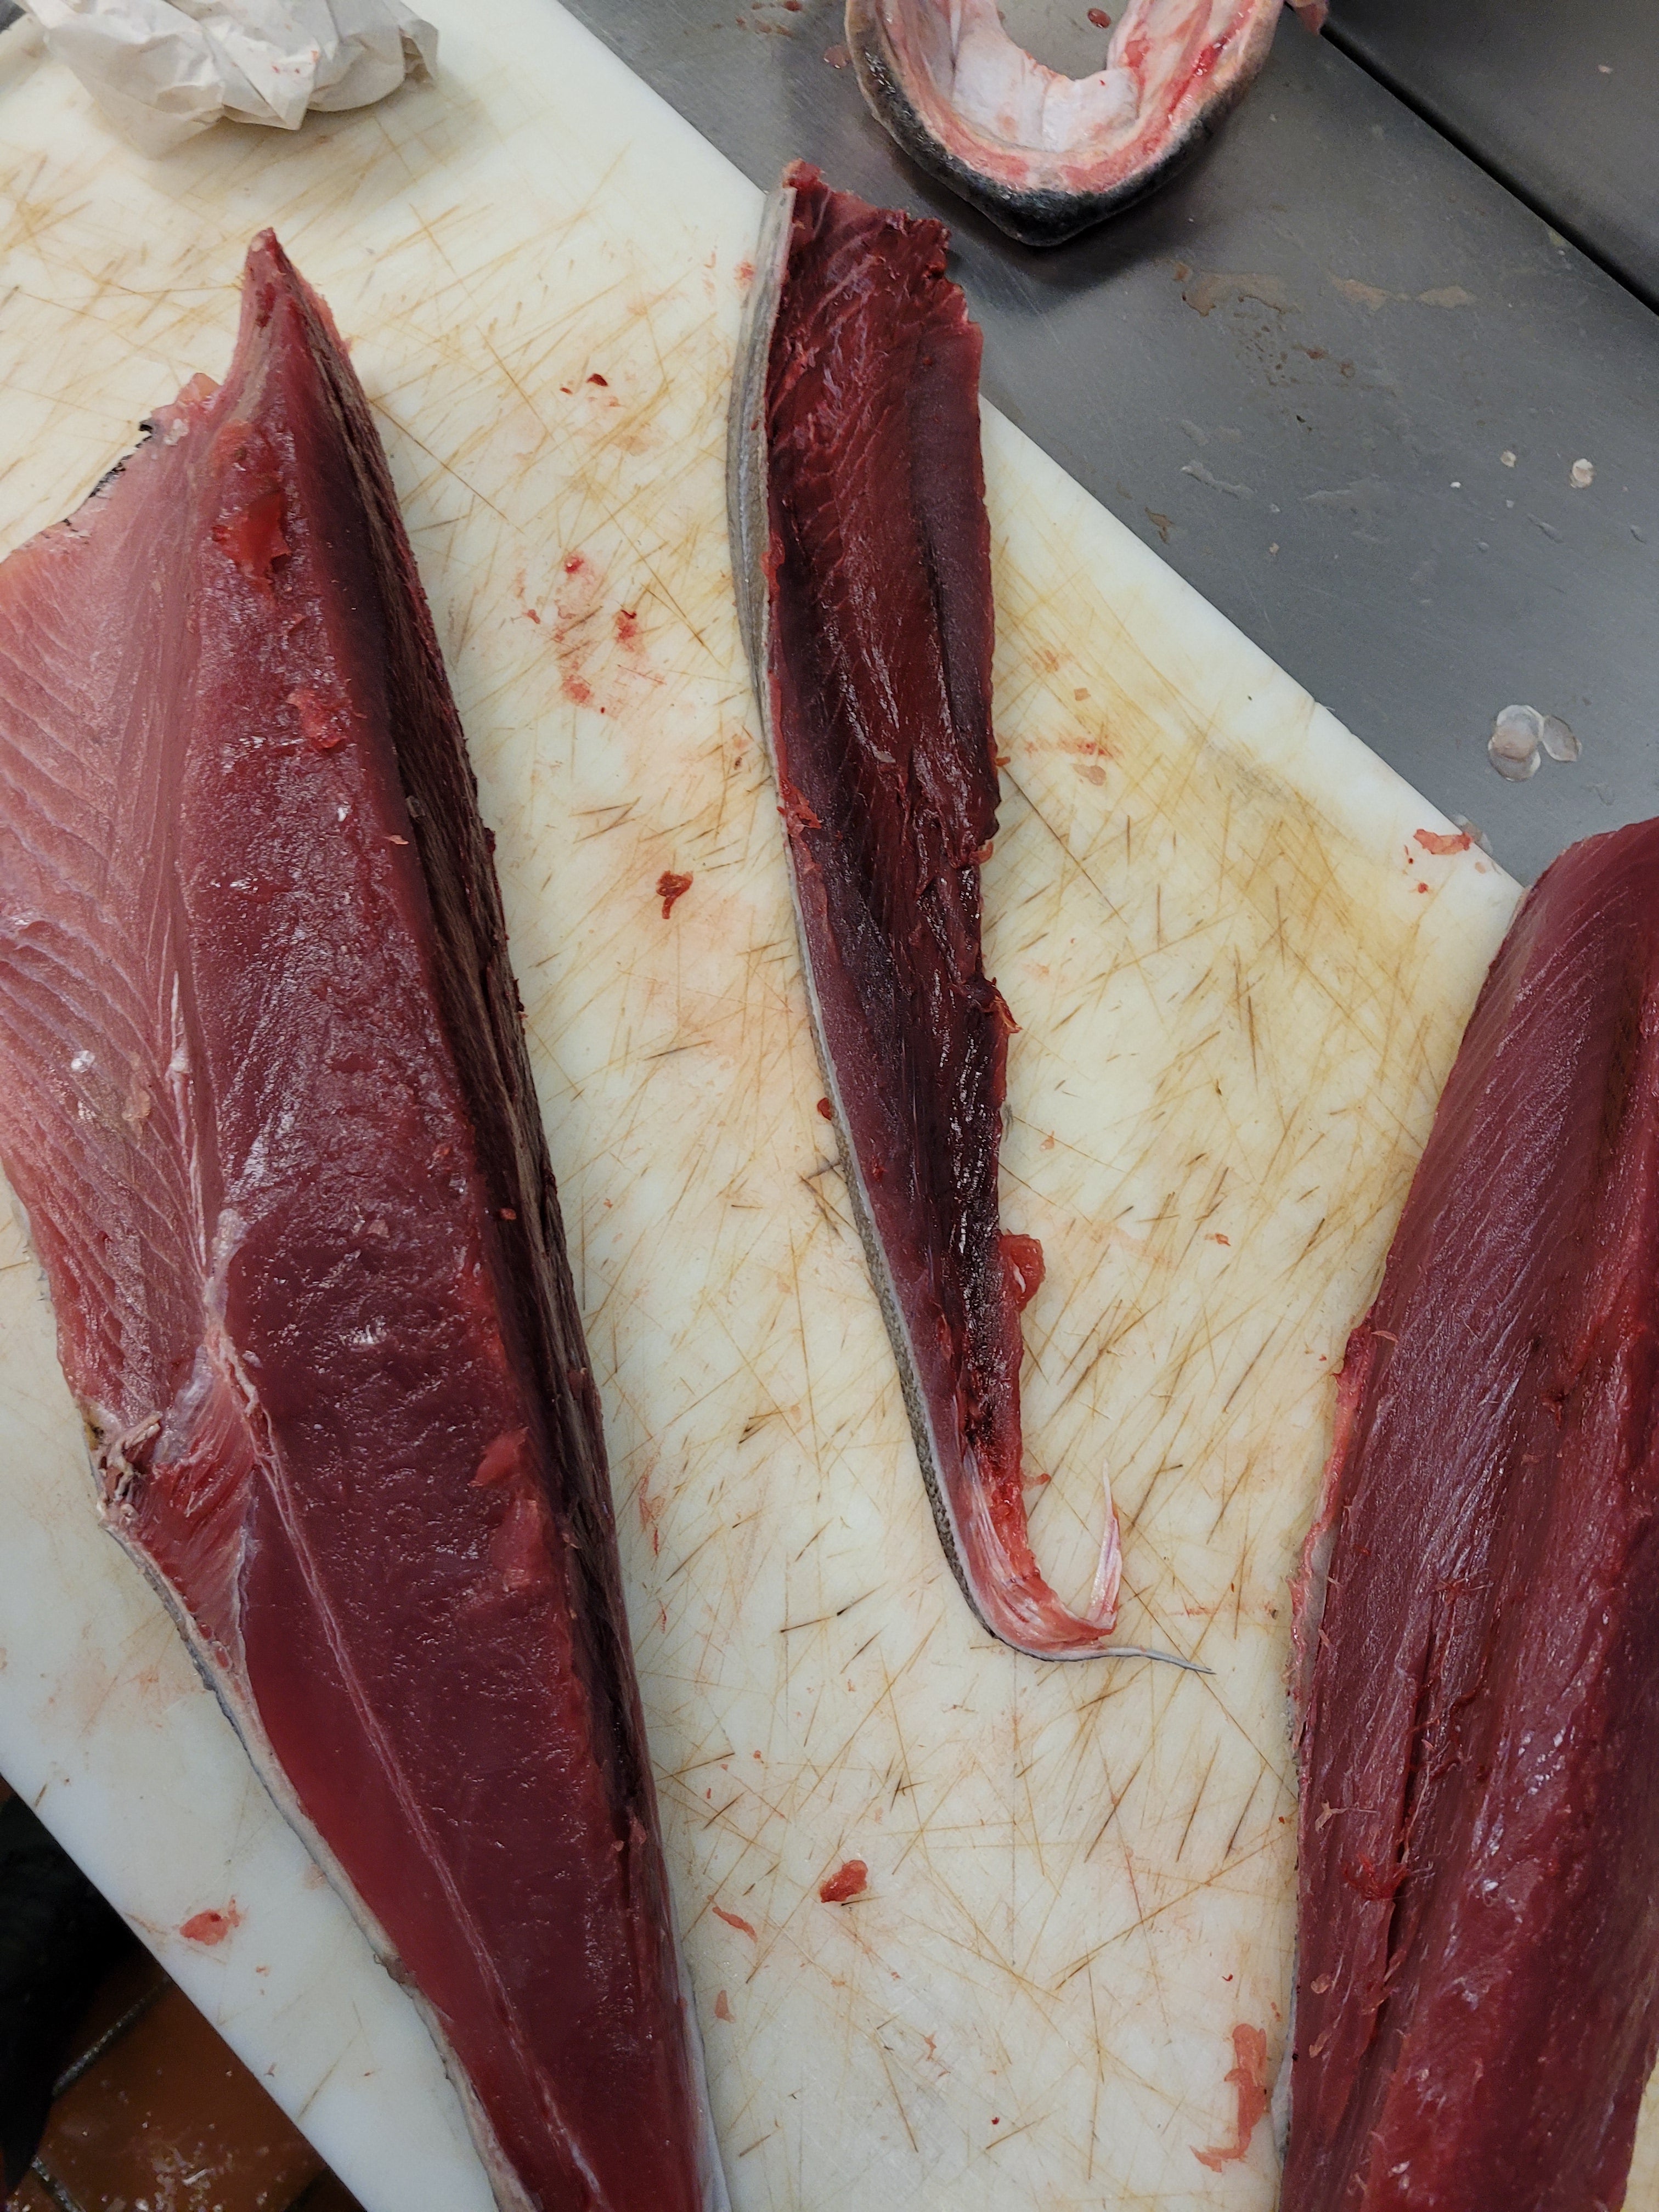
Once you have the fillet off the frame of the tuna, you can then use those pin bones as a guide and cut the fillet into two loins. A top back loin and a bottom belly loin. Now you can trim the rest of the pin bones out of whichever loin they are still connected to. Now it’s time to trim out the bloodline from the tuna loins. These bloodlines are red muscles in tunas which is why they are such powerful swimmers and fighters. It is full of blood and off-tasting oils. That has to be trimmed before the tuna loins are stored or it will leach oil and blood back into the good meat.

So using a long sharp knife you can trim off the bloodline. I use a Japanese yanagiba knife, but a sharp fillet knife will work as well. Do long downward strokes to trim the bloodline out. Don’t use a sawing back and forth motion or it will break the tuna meat up. That will cause issues later when you try to slice it. Once you have the bloodline trimmed out you can wrap the meat side of the loins in paper towel and wrap the whole thing up in plastic wrap for storage. Leave the skin on until you are ready to prepare and eat the tuna. You want to expose the least amount of meat to oxygen possible. Tuna will start to oxidize and turn brown over time, while you can still eat it. It’s just ugly and unappetizing to look at.
Blackfin Tataki is a very easy and quick dish to do. If you’re working with a full loin, I would say cut the loin in half and take the skin off the half you’re going to use. After you skin the loin you will need to portion the loin into usable Saku blocks. You make these by cutting the piece of loin you are working on length-wise. On a blackfin tuna of this size, 20-30lbs, you will get about 3 Saku blocks per loin segment.
For this dish, you will need
- Tuna Sakus
- Course Fresh ground black pepper
- sea salt
- oil
- lemon
- mayonnaise
- wasabi
Now with the Saku block of tuna crust it with coarse ground fresh black pepper and some coarse sea salt. Please use fresh ground pepper, you lose the aromatics with preground black pepper.
Once the tuna is evenly and well coated with salt and pepper. Put a pan large enough for the piece of tuna on the stove and put it on high. Add the oil, anything with a high smoke point will work. Once the pan is hot put the piece of tuna into the pan and start searing all the sides evenly.
You are only searing the outside of the tuna not trying to cook it through. Just sear until the pepper cooks into the surface of the fish and you get a nice crust. Once that crust has formed pull the fish from the pan immediately and put on a plate to rest. I usually throw that whole plate with the tuna into the freezer to chill the fish.
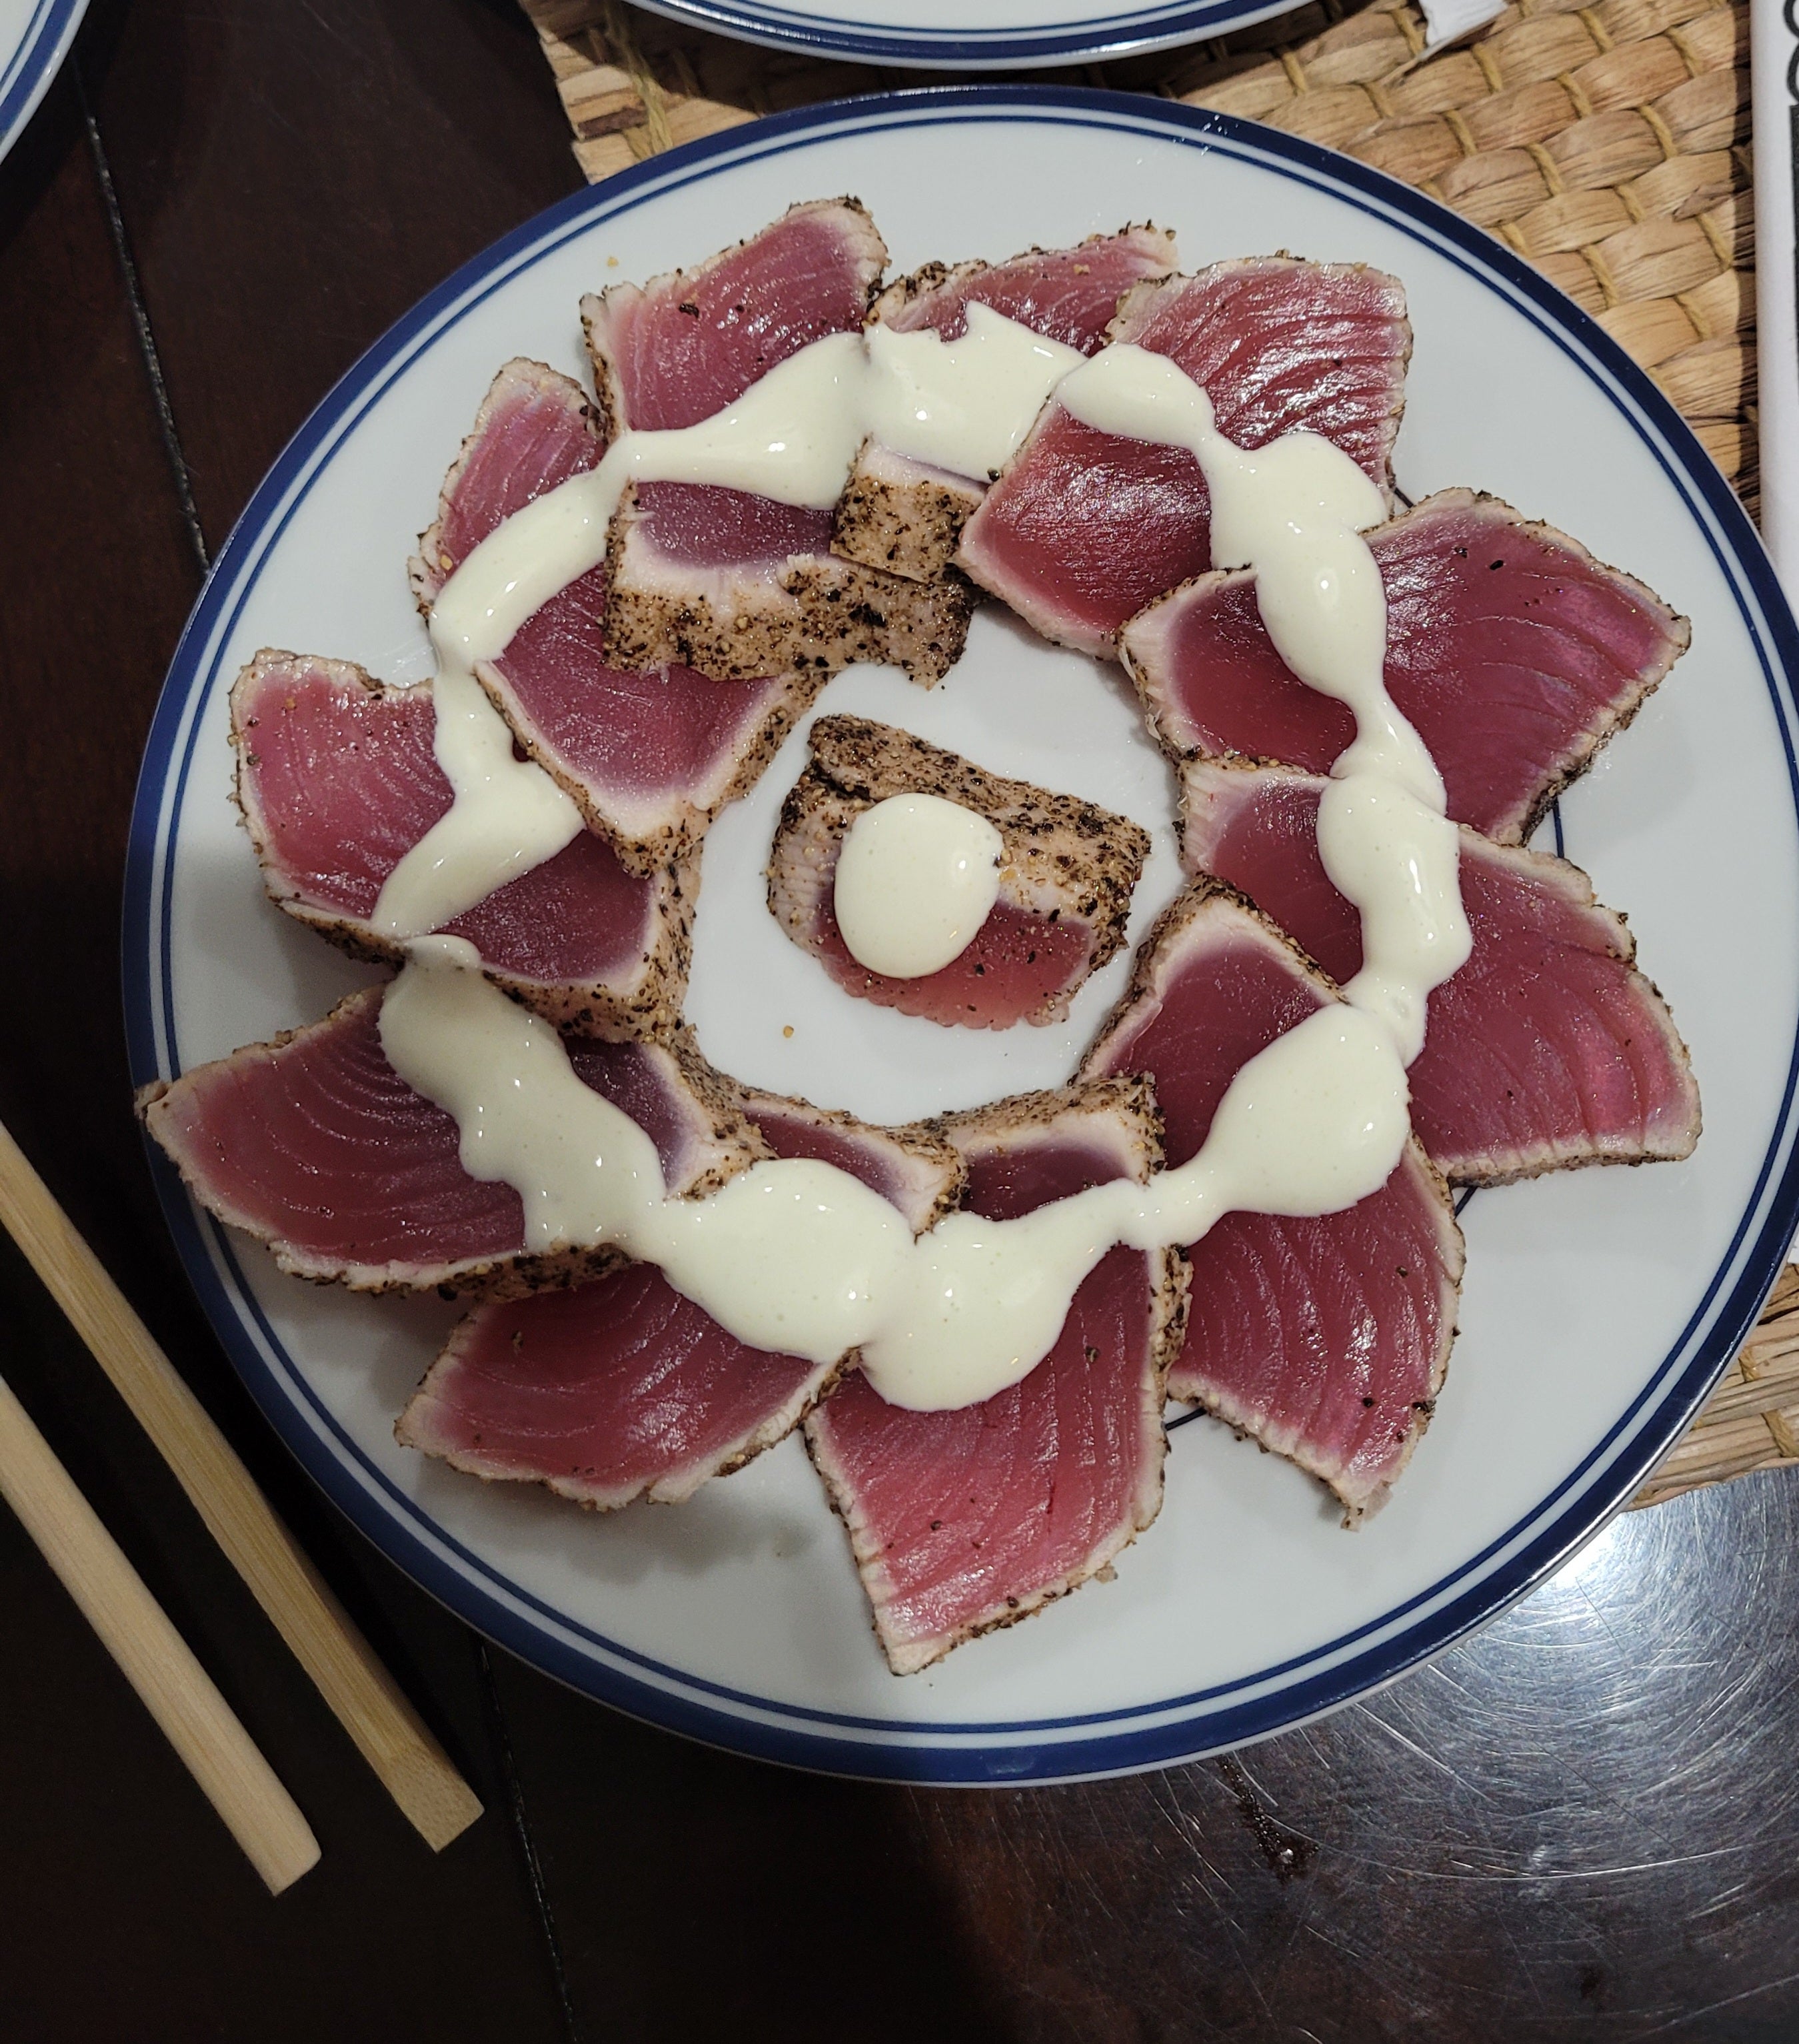
While that cools down time for the sauce. I just made a simple lemon wasabi mayo because that’s what I had available. You can use any sauce you like with this, ponzu works great as well as any sambal chili-based sauce and Japanese dressing too.
The sauce, I used is very straightforward, get a bowl and put some heavy mayo a little wasabi, and lemon juice. Then stir till evenly mixed. Adjust the ratios to your tastes. Put this aside in the fridge till plating.
Get the chilled fish and with a very sharp knife make even thin slices. Again use fast long downward strokes with the knife. Sawing the knife back and forth will break the tuna up. Once everything is sliced, plate it and then drizzle the sauce over the pieces. A side note this recipe works with any kind of tuna, not just blackfin tunas. Then, enjoy!
