AllOutdoor Field Strip: Springfield Armory M1A Tanker
Sam.S 09.29.20
The Springfield Armory M1A has an astounding background in history as a fantastic target rifle, hunting tool, and cousin to the M14 which was used by the United States military and adopted in 1959 and is still in limited use today. The M1A Tanker that I have in my possession was for a review that I had recently done. You can check out that review HERE over at our sister-website TheFirearmBlog (TFB).
Before I send this classy chunk of American walnut and steel back to Springfield Armory to probably be reviewed by someone else down the road, I thought it may be helpful, educational, or overall enjoyable to take a deep dive into how to field strip such a gun. This firearm has a lineage stretching all the way back to the M1 Garand and much of this rifle’s takedown can be used in tandem. Note that even though the Tanker is an M1A it has many differences due to its being a part of Springfield Armory’s SOCOM line up of M1A rifles but since the actual field stripping does not involve the business end of the gun the disassembly is basically the same.
AllOutdoor Field Strip: Springfield Armory M1A Tanker
- First thing is first! Practice all the rules of gun safety. When disassembling a firearm you should always wear safety glasses due to multiple parts being under spring tension. Triple check that the M1A is unloaded. Check the chamber, magazine, and the area in between. All set? Let us jump right into it!
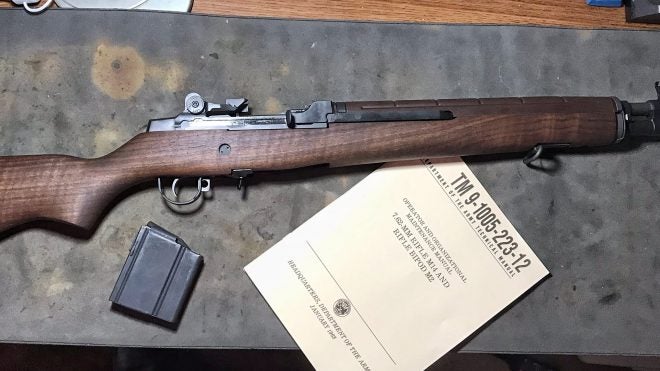
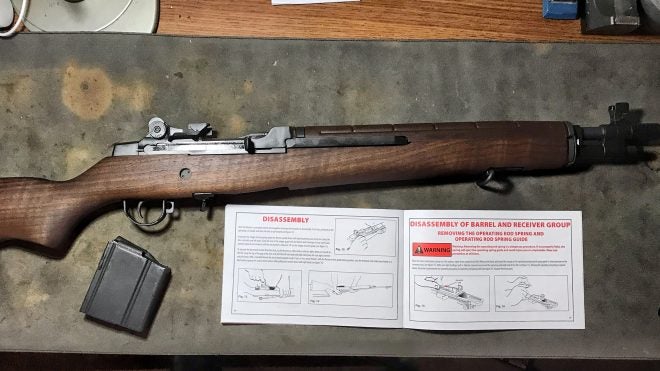
Springfield Armory M1A Tanker 308 Rifle and included Military M14 rifle manual. - It would not be a bad idea to consult both the included military M14 manual as well as the Springfield Armory M1A manual before even considering to jump into disassembly. Take your time and find a good bench with plenty of space. Though this specific rifle is short and stout when disassembled it can take up quite a bit of space. Never underestimate the capability of your firearm to suddenly need more room!
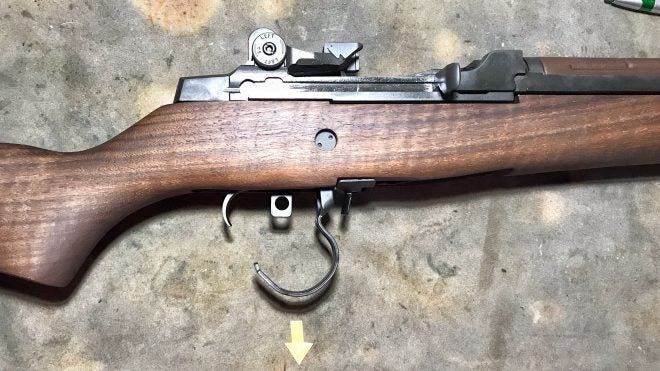
Springfield Armory M1A Tanker 308 Rifle and included M1A rifle manual. - Starting out you should put your rifle facing down so that the magazine well is facing upwards. The picture below is showing what the side view would be for a demonstration. When making sure the gun was unloaded you should have cocked the hammer at some point and let the action move forward at rest. Start by pulling the trigger guard straight away from the rest of the gun. Not forward toward the muzzle or to the buttstock but straightway shown with the arrow below the trigger gaurd.
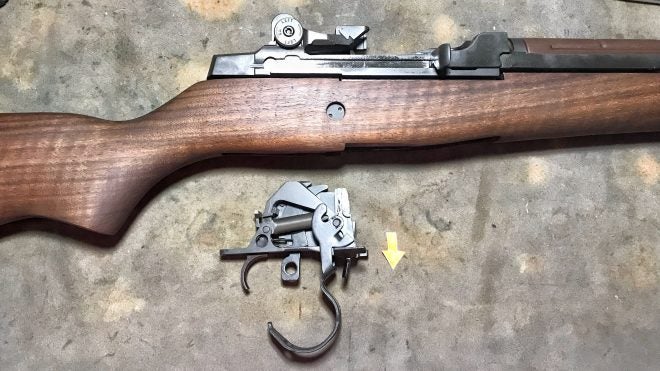
- Next, the trigger mechanism and assembly can be gently removed from the stock. It can be slightly tricky and require some soft wiggling but it should work free if the guard has been rotated out all the way. Note that at this point the receiver is barely being held in by anything and if lifted up may suddenly drop free! Ideally, leave the gun resting upside down for this process.
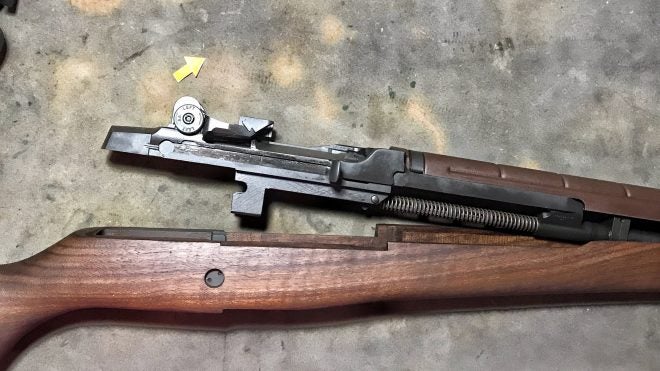
- Next, you can either keep the rifle upside down or I prefer to flip it to its side (I do not lift it up!). The rear of the receiver should now be able to be lifted out of the stock and hinged to the front. This is shown with the arrow below. At no point in this field stripping should you need to hammer or pry anything apart. Take your time so that you do not damage your rifle.
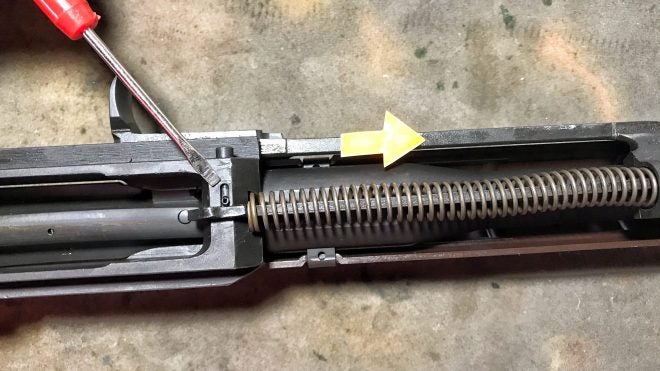
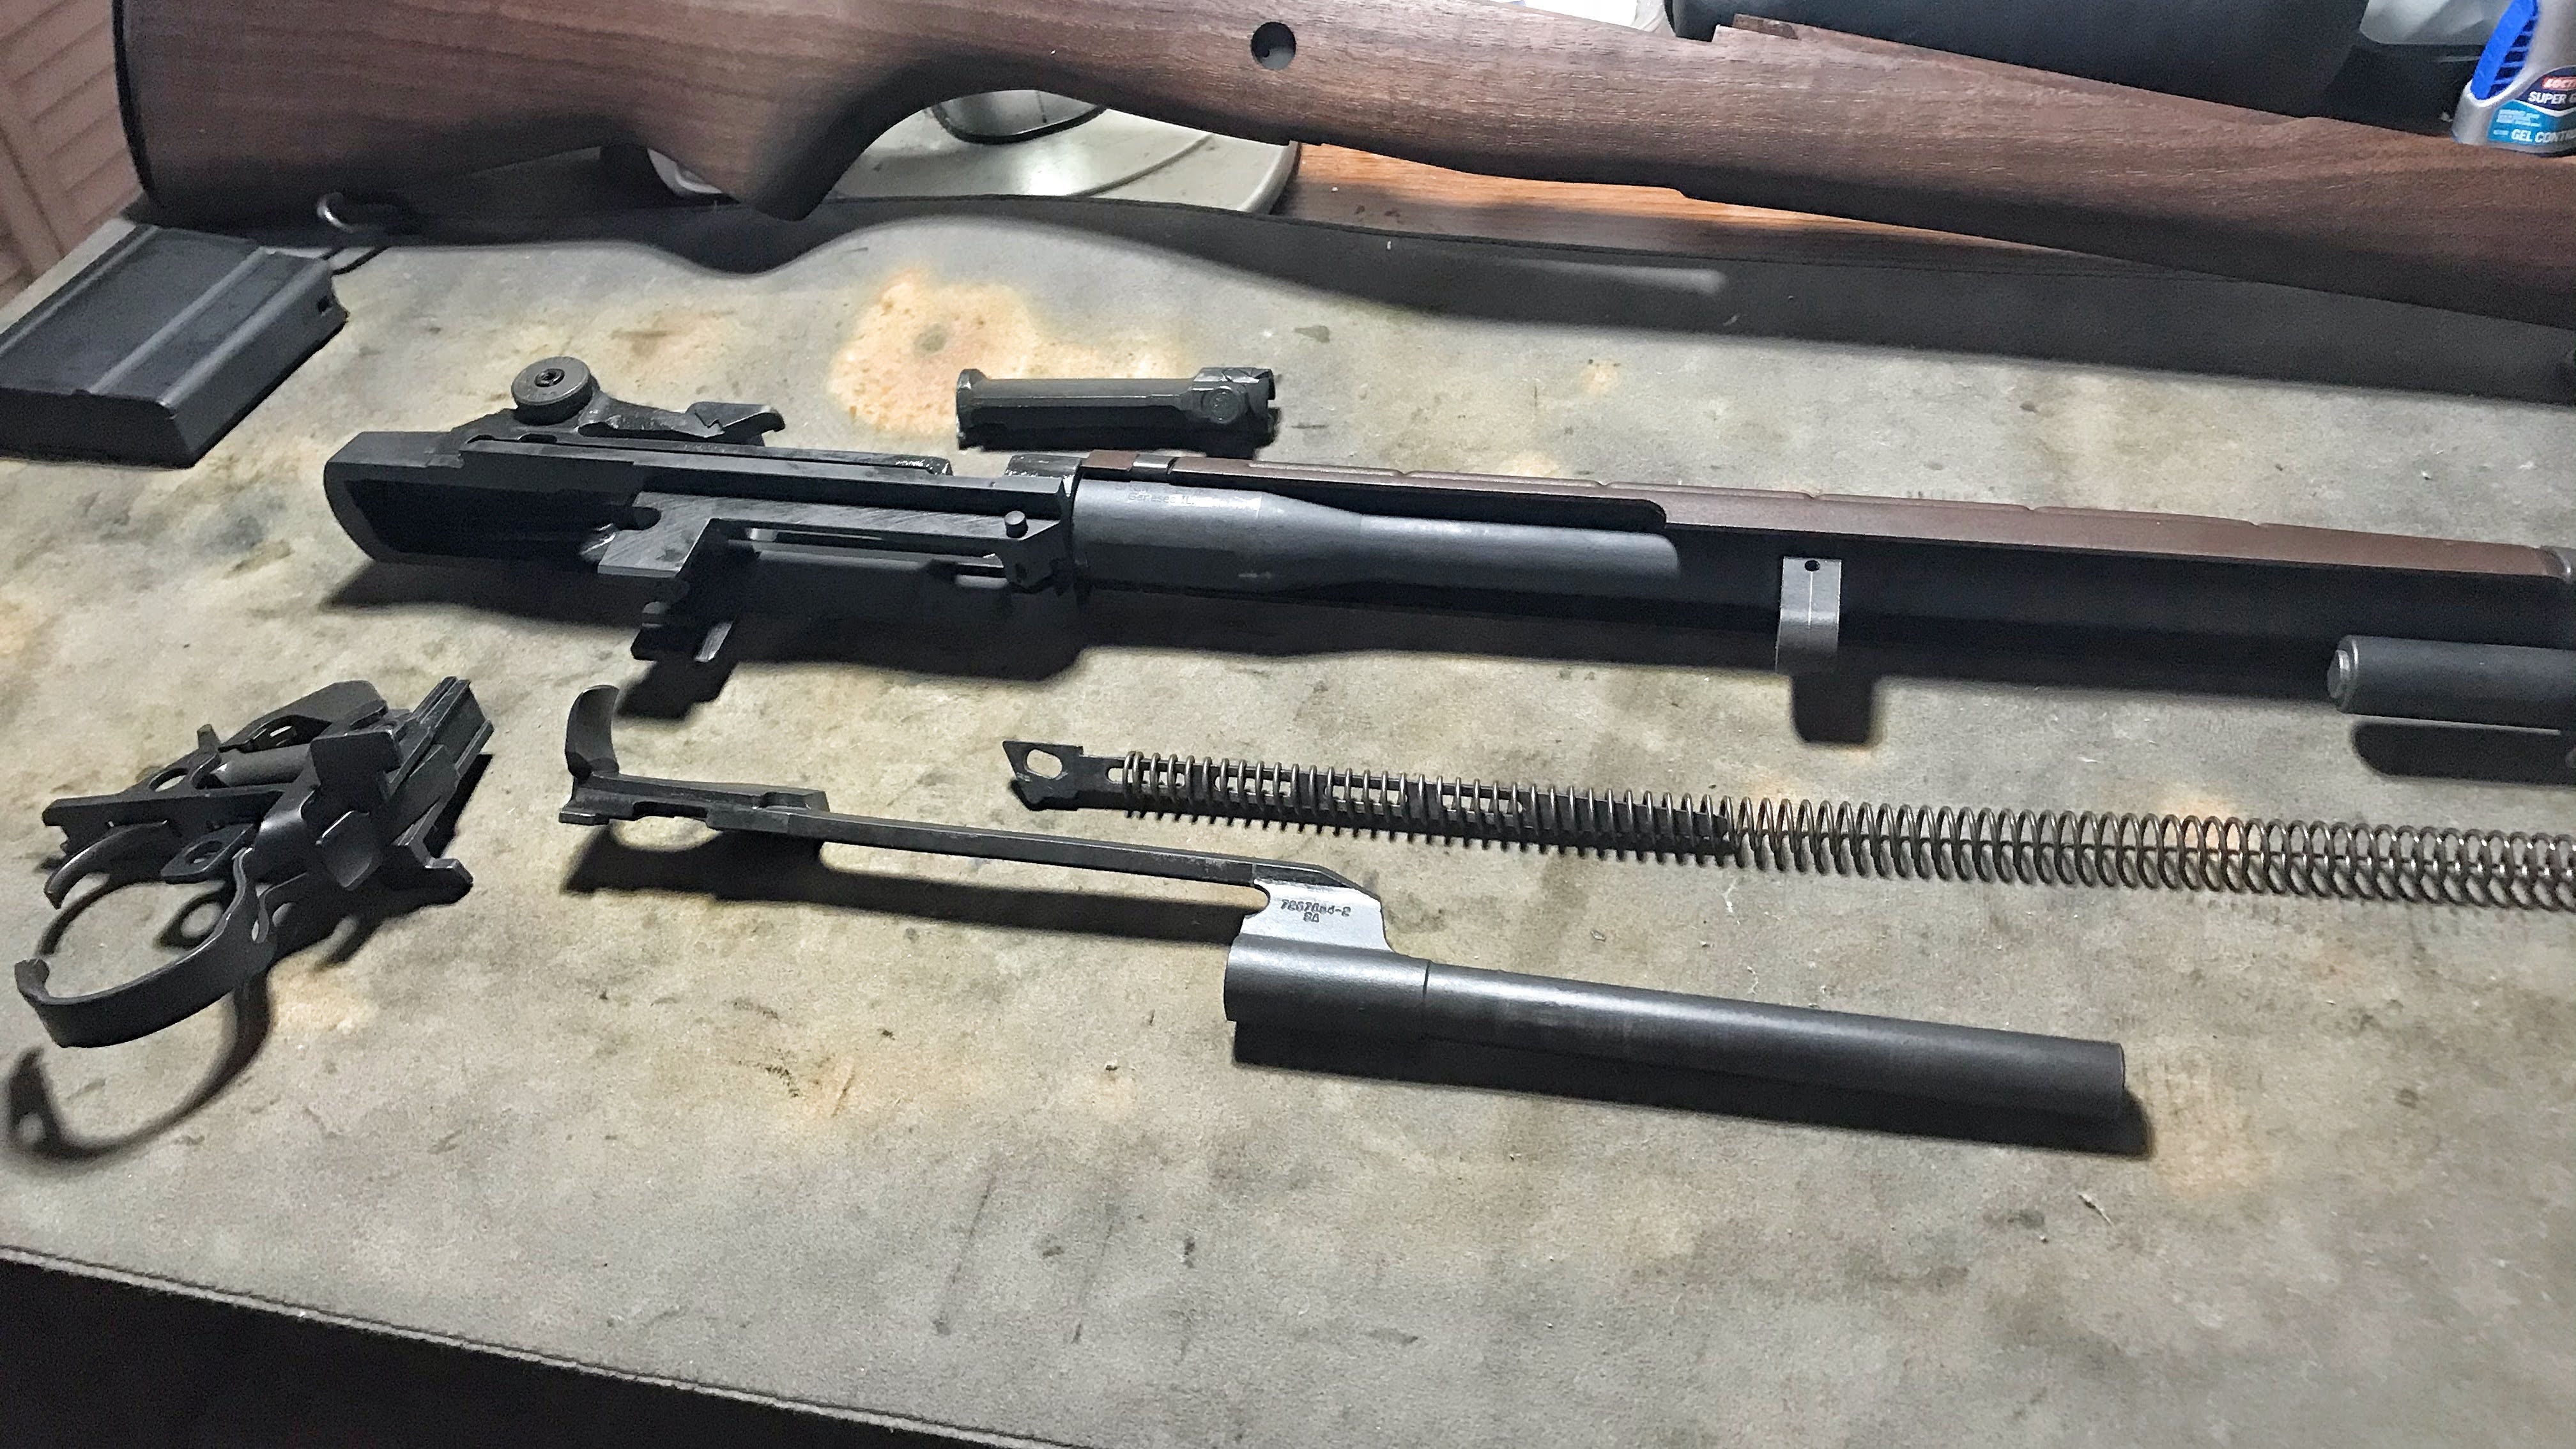
- Now the barreled action can be hinged completely out of the stock. Keep an eye at the point that the receiver, action, and barrel are moving forward and make sure nothing is getting caught or sticking. Remove the barreled action from the stock and place it back in the upside-down configuration we started with. Note the relationship of parts below. The operating rod, spring, and catch are all pictured and important in the next step.
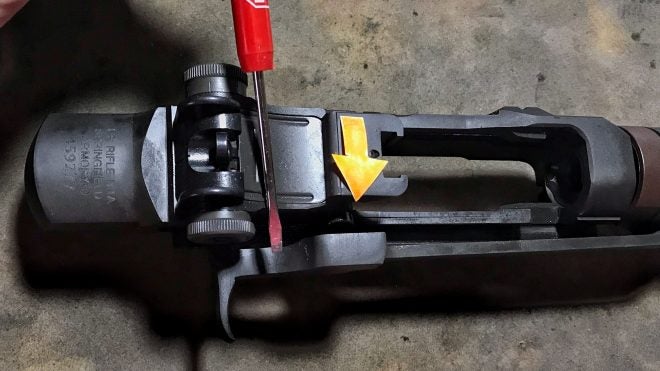
- This part if any is the most important for you to be wearing safety glasses and in a space devoid of breakable valuables. While grabbing hold of both the spring and operating rod which are both under spring tension, pull in the direction of the arrow shown while also sliding the catch toward the flathead pictured above. Slowly and carefully let the operating rod and spring to the rear of the gun.
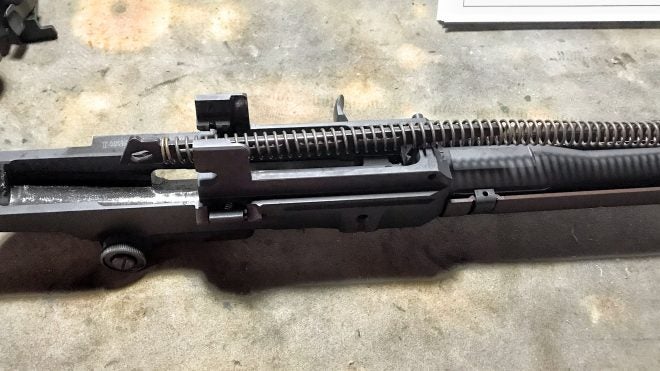
- After the tension is slack you will be able to remove the operating rod and spring to the rear with little to no hassle. Note the picture above.
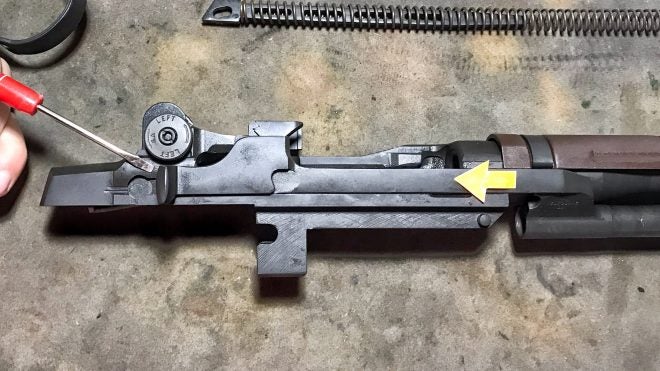
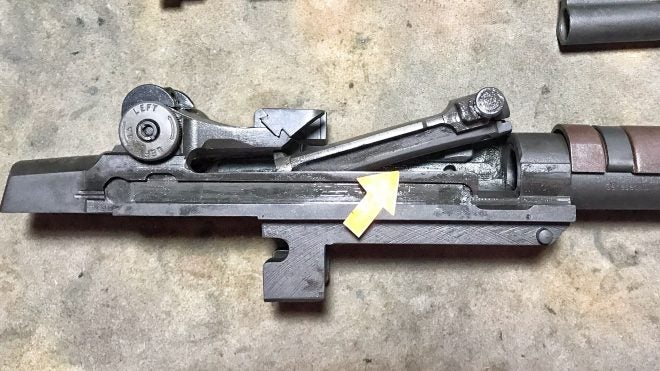
- From here we can put the barreled action on its side and slide the charging handle to the rear until it covers a cut out intended for field stripping. The picture above is showing the handle in the correct spot. It can be difficult getting it to perfectly match up and lift out but be patient and do not force it to do anything if there is strong resistance.
- As the picture above shows the charging handle can be pulled out through the aforementioned cut and from there it can be slid forward, twisted, and pulled from its guide under the barrel.
- After removing the charging handle/operating rod from the rifle you can begin removing the bolt. Start by sliding it forward from the rear of the receiver while lifting up. This can take some time to get the alignment just right but eventually, the bolt should be able to be twisted and lifted free.
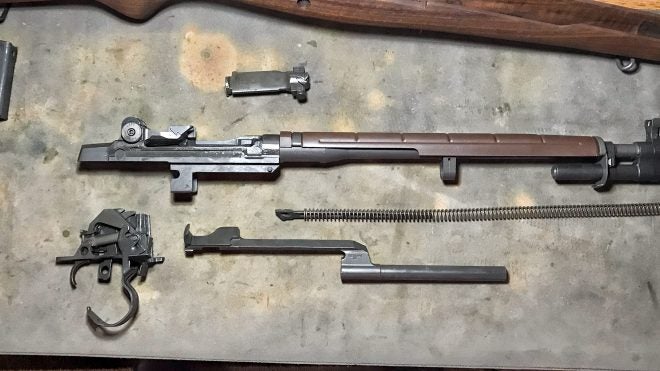
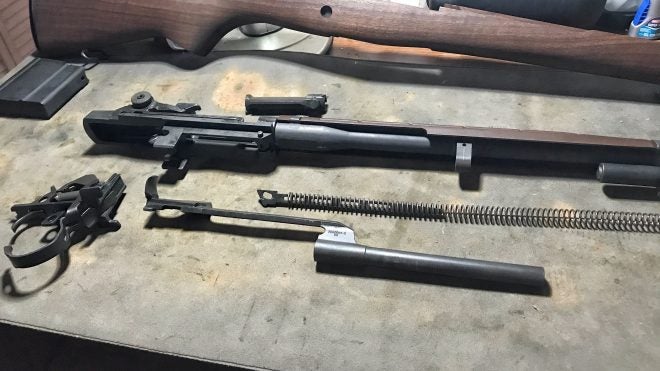
- Now the field strip process is complete! Ensure all your parts are accounted for, cleaned, properly lubed, and ready to be put back together. Reassembly is quite simple if you follow the steps in reverse. Remember to be careful of the operating rod and its spring!
Big thank you to Springfield Armory for making this possible and to anyone who tuned in and followed along! I hope this was helpful and educational. Please always remember to practice proper gun safety and to be mindful of parts so that you do not lose any. Safe and happy field stripping!
