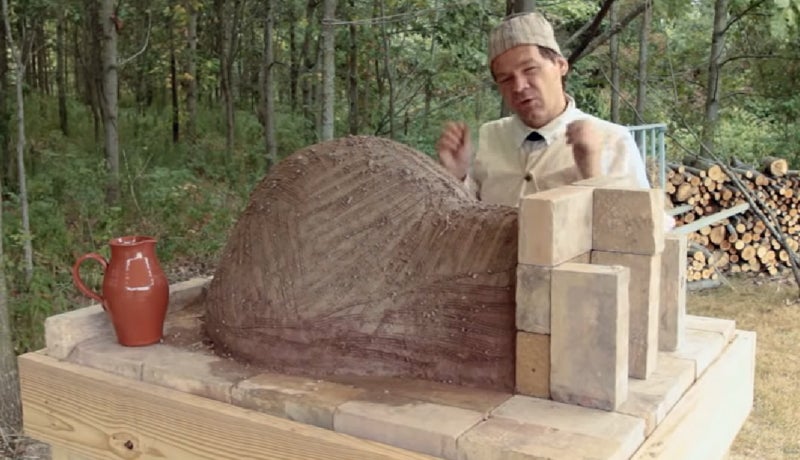
How to Make an Earthen Oven and Bake Bread in it.
Russ Chastain 09.26.18

We start out with another good video from Townsends, which talks about the history of earthen ovens and then goes on to tell you how you can make one yourself. And if you ever were to find yourself in an off-grid situation, this info might be come in pretty handy.
You’ll need sand, clay, and grassy fiber such as straw or hay, and something (such as a tarpaulin) on which to mix it into cobb. And then you will need a base for your oven. He chose a wooden table with a firebrick top.
On that, he builds a positive form around which to construct the oven. He used wet sand and bricks to build up a sand castle-type dome, which he then covers with paper to prevent it from sticking to the cobb.
Make sure you get the height of the opening tunnel just right; if it doesn’t match the correct ratio, your oven won’t work properly.
The first layer of cobb is just sand and clay (no straw). Make it about three inches thick, and allow it to dry somewhat — but not too much. The second layer is about as thick, but contains the straw binder that provides more strength to the finished product.
Once you finish it up, get ready to wait — for weeks — for it to dry before you apply fire to it. He was able to remove some of the supportive sand from his after a day or two.
Next up is part 2, in which he stokes up a good fire and bakes some bread. After some discussion of the items you’ll need, he tells us it’ll take a couple hours to get the oven warmed up.
You’ll know it’s warmed up when it stops producing smoke and the black soot inside burns to gray ash. And to my surprise, all the fire is removed before any baking takes place. When it finally does happen, the actual baking only takes 10-12 minutes.
Interestingly, you can cook all kinds of different things in one of these ovens after you bring it up to heat. You simply start with whatever needs the most heat to cook, and progress to things that don’t need much — such as drying herbs or even drying out the wood for your next baking day.
Happy baking!